
[ad_1]
The Deathright Silo in Borderlands 4 is positioned in The Low Leys within the Terminus Vary. Attending to the Silo is not going to be simple, given the panorama, however in the event you’re trying to purchase SDU (Storage Deck Improve) Tokens, that is one option to do it. There will not be many enemies to cope with on the way in which to the Deathright Silo, however you’ll need some slick strikes to get to the situation.
That stated, this is how you can get to and unlock the Deathright Silo in Borderlands 4.
The place to seek out the Deathright Silo in Borderlands 4
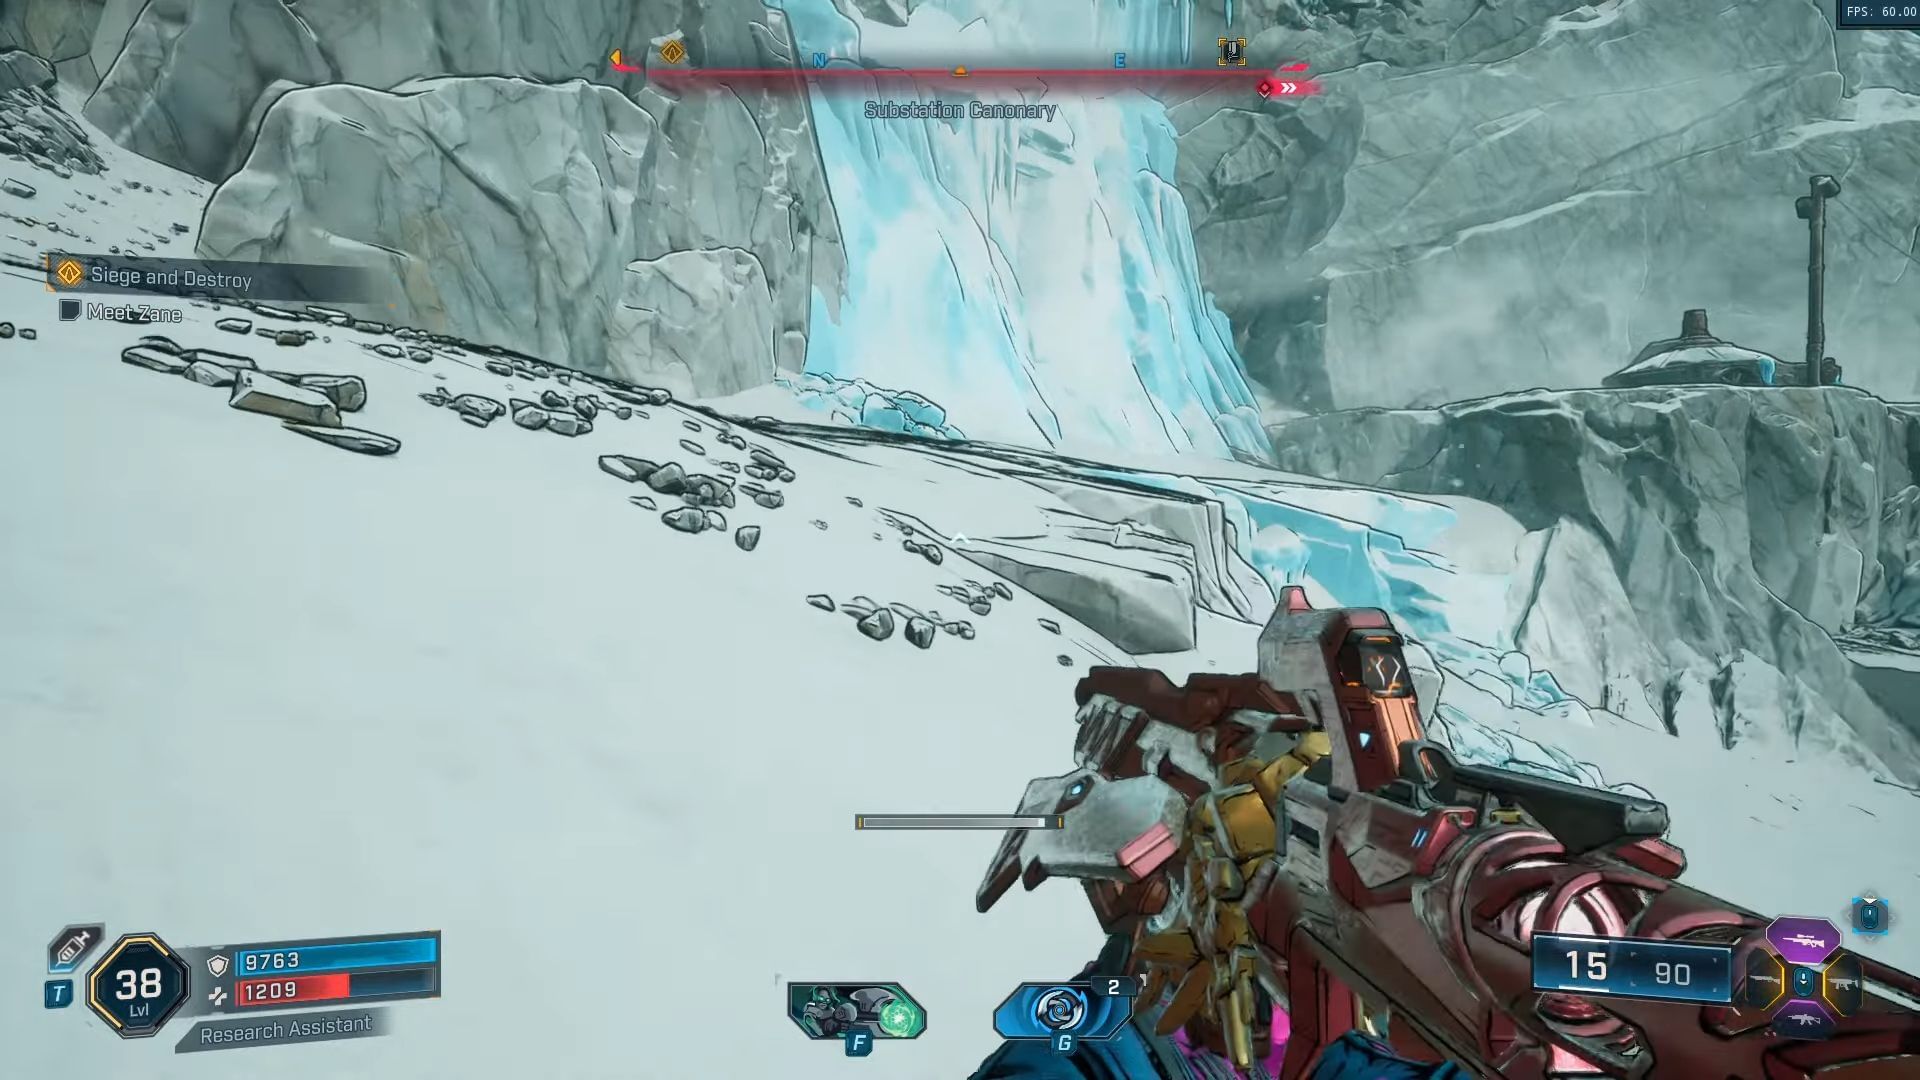
As talked about, the Deathright Silo is positioned within the Terminus Vary in direction of the northern a part of the primary area. Substation Canonary (sub-region) is your start line. Search for the frozen waterfall, and begin making your approach up the hill. This will probably be your start line.

Maintain going up the slope till you cross the frozen waterfall and see a grapple level. You’ll have to stroll fairly a bit to achieve it. Grapple and make your approach atop the hill, stroll previous the construction (maintain to the left), and maintain strolling till you attain a ledge.
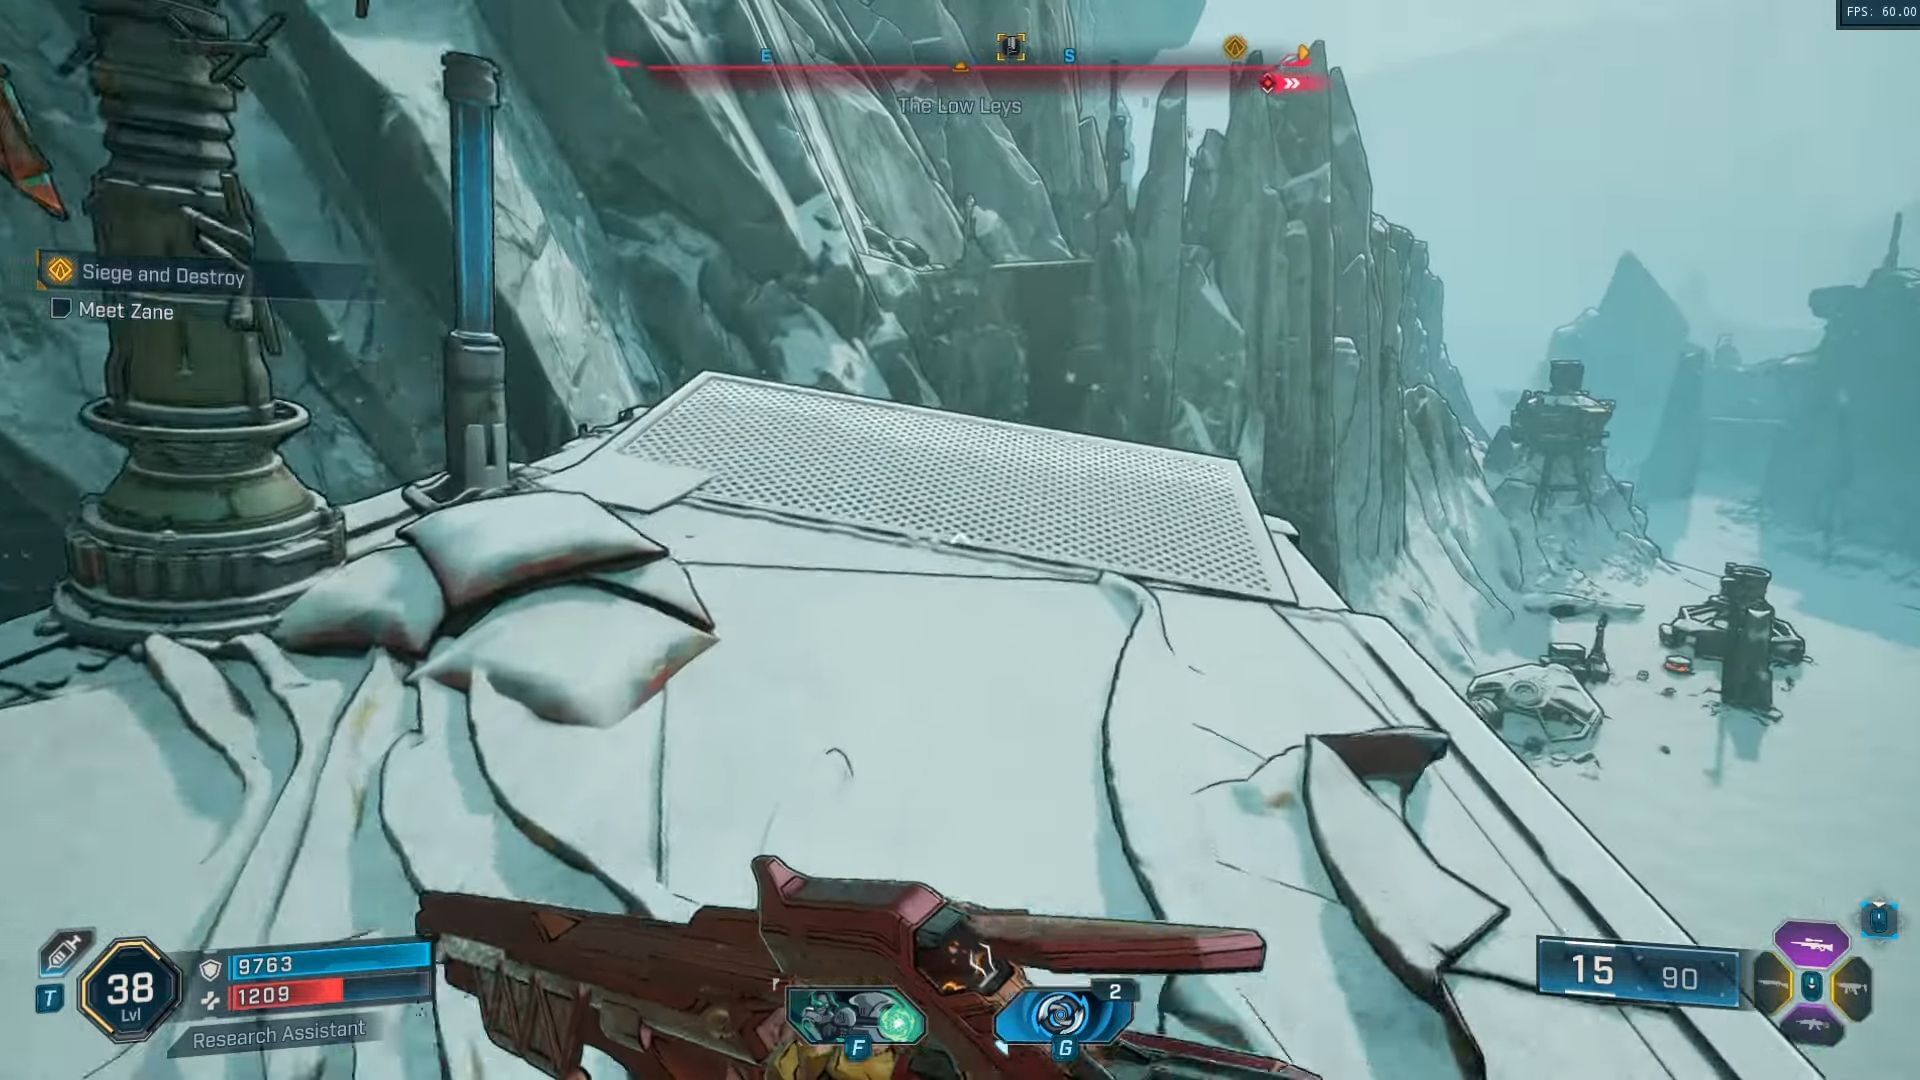
As soon as on the ledge, soar and glide in direction of a metallic wall that will probably be on the far aspect of the ridge. Attempt to not botch the touchdown, or else you’ll have to begin over once more. As soon as atop the ridge, transfer ahead till you see a ramp.
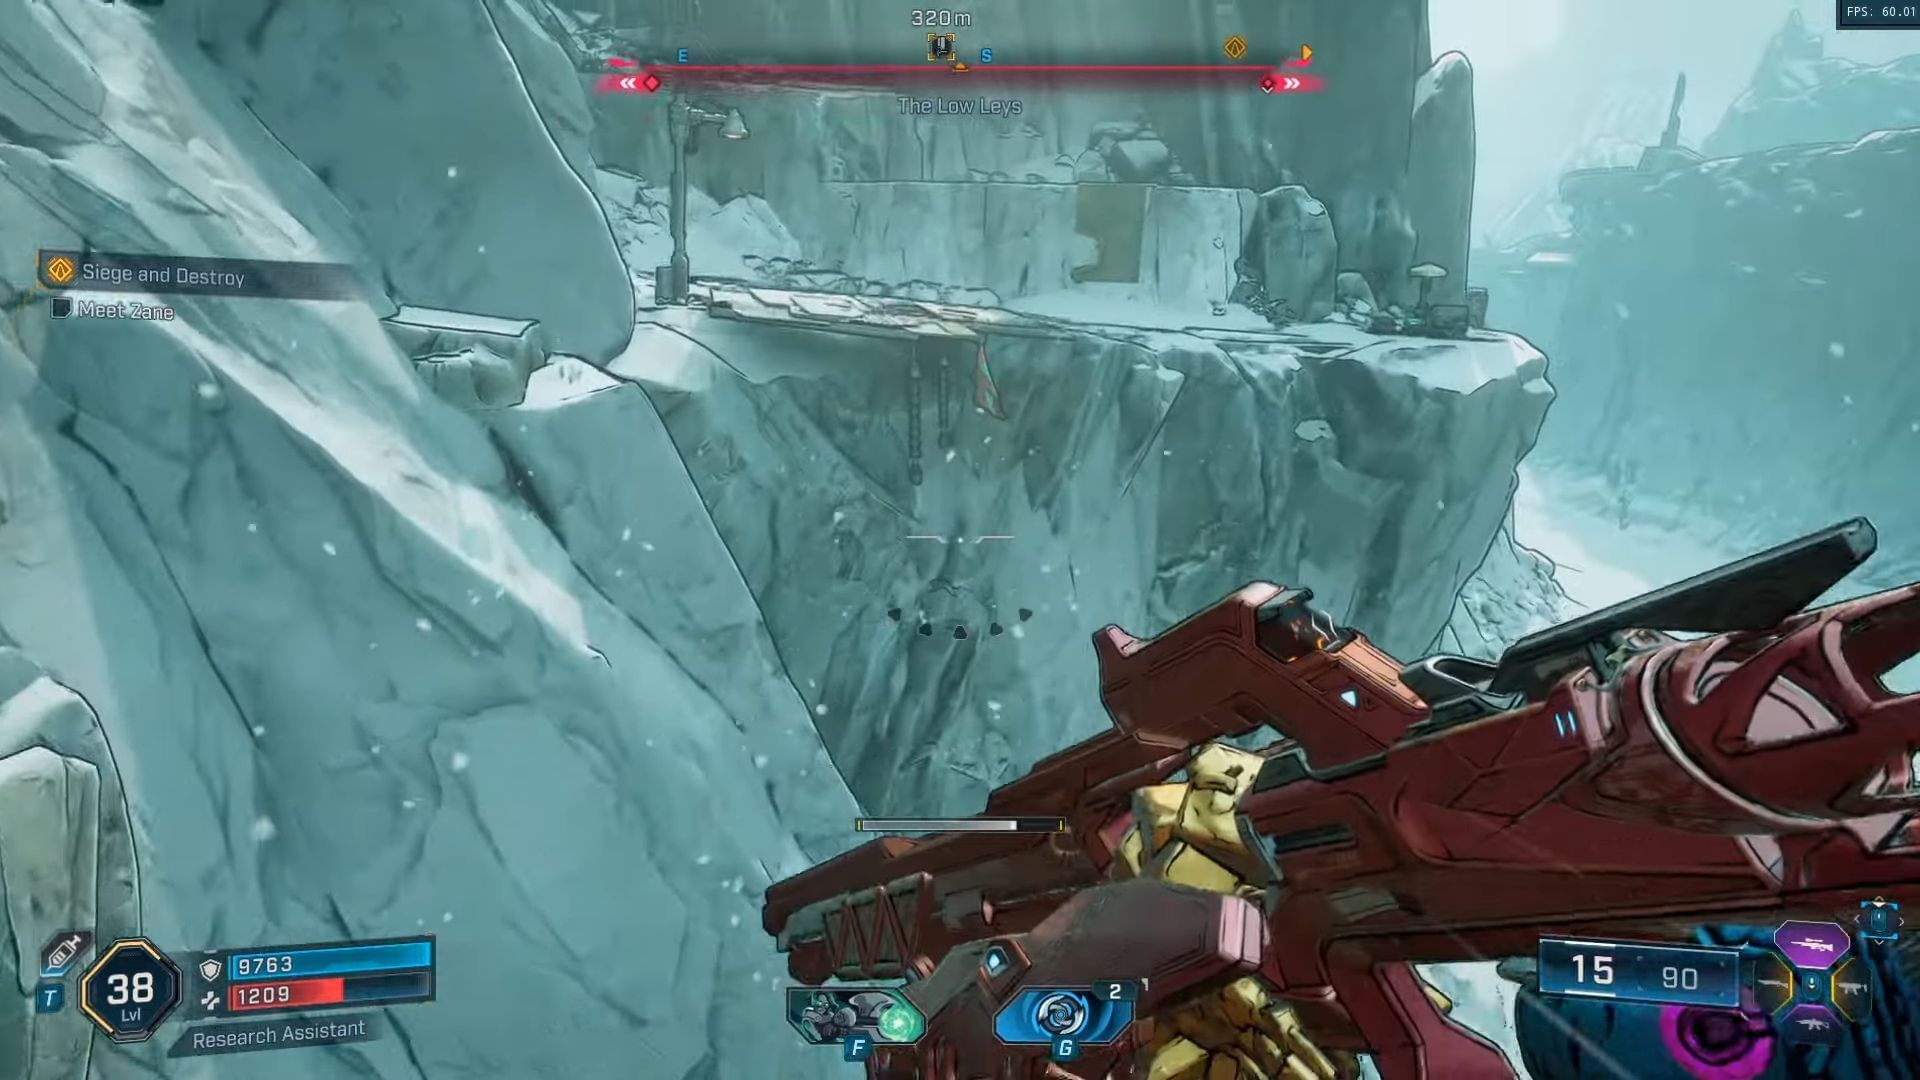
Leap off of it and glide to the opposite aspect, and begin scaling up till you attain the Kratch Nest. Kill or ignore them and make your option to the construction on the very finish of the pathway.
The right way to unlock Deathright Silo in Borderlands 4
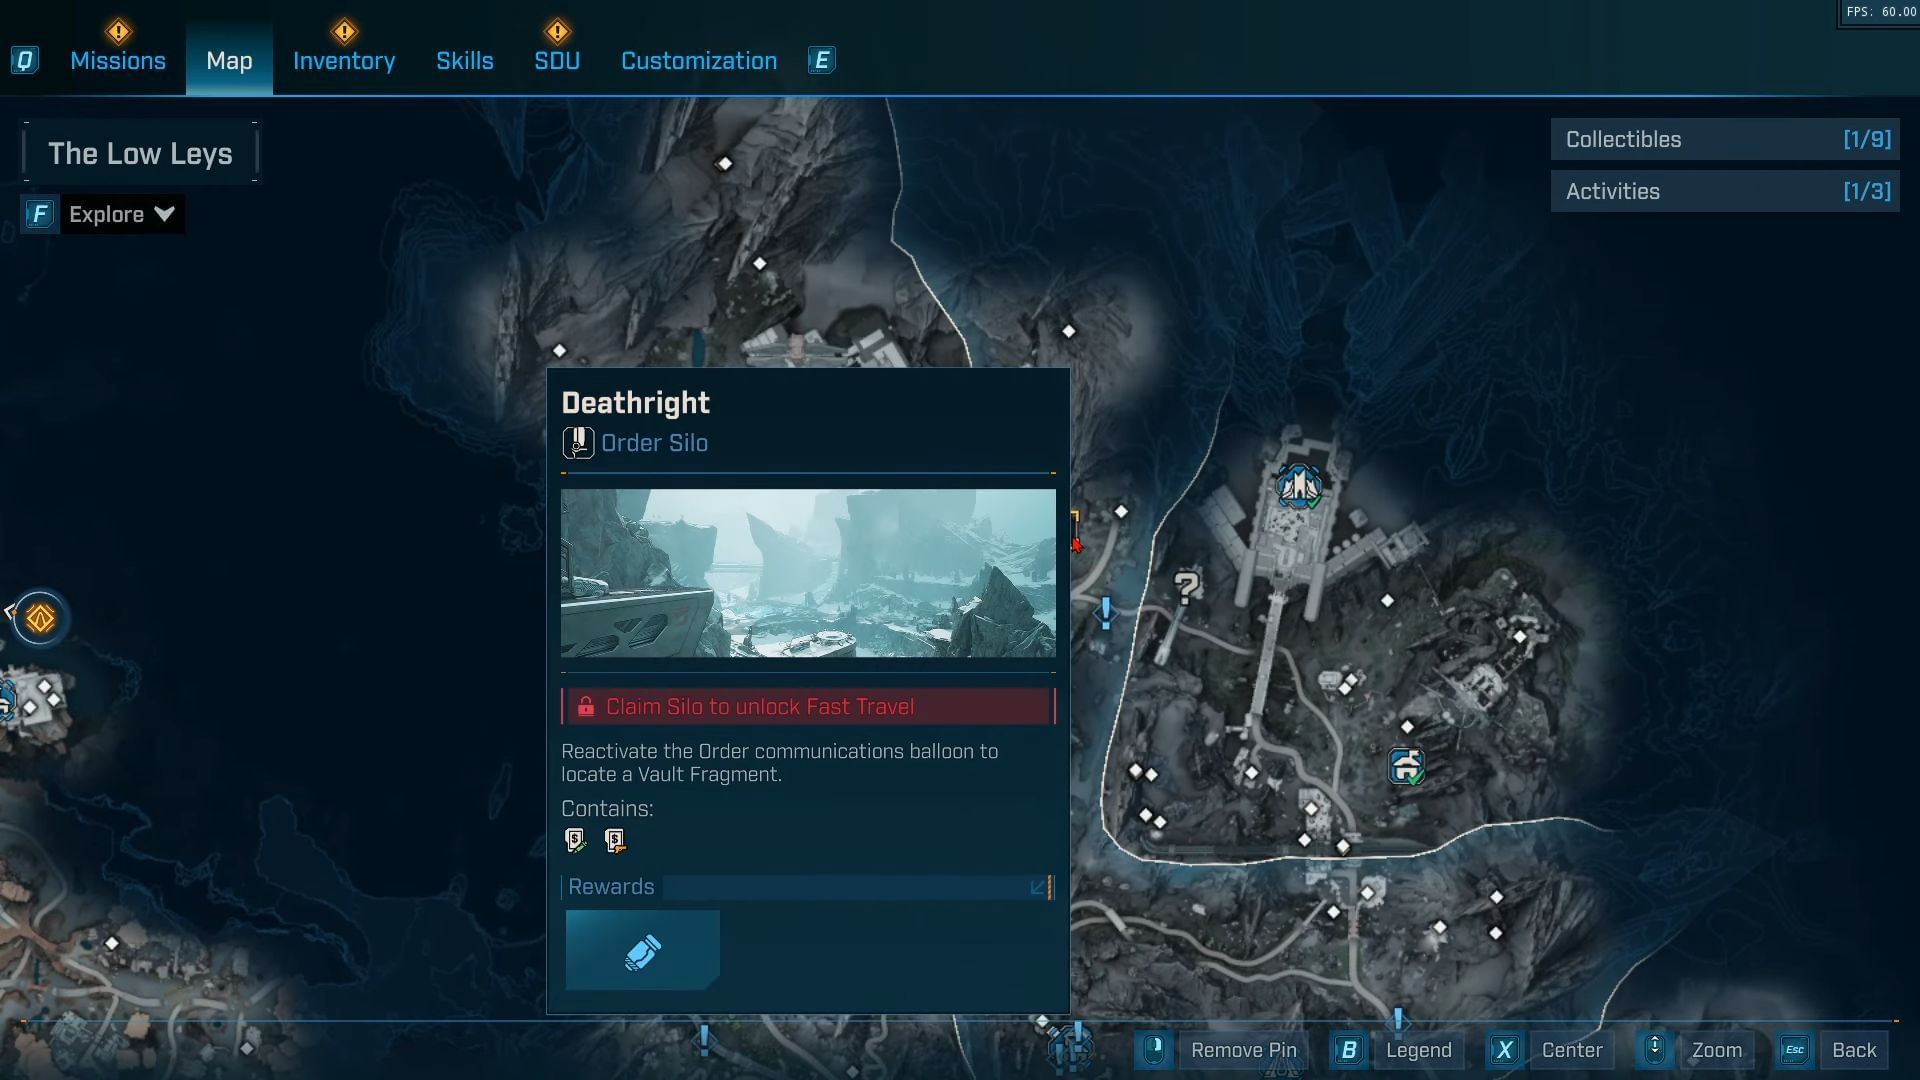
When you’re contained in the construction, activate the terminal, and you should have unlocked the Deathright Silo. This will provide you with a further Quick-Journey level to utilize whereas exploring Kairos. Remember that attending to this Silo will take some trial and error in the event you’re not aware of mobility, however it is going to be well worth the effort and time.
Learn extra articles right here:

alt=”Matthew Wilkins” top=”72″ width=”72″>
Edited by Matthew Wilkins
[ad_2]