

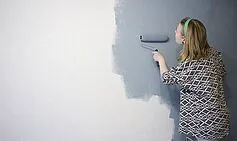
Revitalizing a home with a fresh coat of paint can dramatically enhance its appearance, offering a sense of renewal and style. Whether tackling a new property or updating a long-standing living space, the impact of a well-executed paint job is undeniable. However, achieving a professional finish requires more than just selecting a new color; specific techniques are crucial. Mastering the art of ‘cutting in’ edges and employing the correct roller technique for an even coat are vital steps. Yet, a common, easily avoidable error can undermine even the most careful preparation, as one homeowner recently discovered.
The Common Painting Pitfall: Tape and Bleed
India Brown and her partner, Luc, embarked on the exciting journey of renovating their first home together in June of this year. Documenting their progress, Brown recently shared an experience that highlights a prevalent mistake in DIY painting. Tasked with painting her home’s doorframes a sophisticated black, she meticulously applied painter’s tape to protect the adjacent white walls. The intended outcome was a crisp, clean line separating the black doorframe from the white wall.
However, upon removing the tape, Brown was dismayed to find that the black paint had seeped underneath, creating jagged, uneven edges where a sharp demarcation was expected. This ‘bleeding’ effect marred the intended aesthetic, leaving the doorframes looking untidy and detracting from the overall professional appearance she aimed to achieve. The social media video she shared captured the moment of disappointment as the tape revealed the imperfect result.
The Simple Solution: Timing is Everything
Fortunately, the issue that plagued Brown’s doorframe painting project is resolvable with a simple adjustment to the process. The key lies in the timing of tape removal. Instead of allowing the paint to dry completely before peeling off the tape, the optimal strategy is to remove it while the paint is still wet.
This technique prevents the paint from drying onto the tape itself. As the paint dries, it can form a slight raised edge. When tape is removed from fully dried paint, this edge can crack or pull away unevenly, leading to the bleed. By removing the tape while the paint is still wet, any excess paint along the edge is pulled away cleanly with the tape, leaving a sharp, unblemished line.
Expert Tips for Preventing Paint Bleed
The experience shared by India Brown resonated with many DIY enthusiasts, prompting a flurry of advice in the comments section of her post. These suggestions offer further layers of protection against paint bleed, catering to various scenarios and preferences:
- Remove Tape While Wet: This is the primary and most effective solution. As soon as you’ve finished painting an edge and before the paint has a chance to dry, carefully and slowly peel away the painter’s tape. This minimizes the risk of the paint drying onto the tape and then tearing or bleeding when removed.
- The “Paint Over the Tape” Trick: A popular method involves applying a thin coat of the wall’s original color over the edge of the tape that meets the wall. This seals the tape’s edge with the wall color. Once this thin coat is dry, you can then proceed with painting your desired color (in Brown’s case, black) onto the doorframe. When it’s time to remove the tape, the initial seal prevents the new color from bleeding underneath.
- A Variation on Sealing: Another effective technique, similar to the above, involves painting the wall color over the tape edge before applying the main color to the trim. After this initial seal coat dries, you then apply your desired trim color. When removing the tape, it’s often recommended to score the edge lightly with a utility knife to ensure a clean break from any dried paint, especially if the tape wasn’t removed while wet.
- Choose High-Quality Tape: Not all painter’s tapes are created equal. Investing in high-quality painter’s tape specifically designed for clean lines can make a significant difference. These tapes often have a micro-barrier that helps prevent paint from seeping underneath.
- Proper Tape Application: Ensure the tape is pressed down firmly and evenly along the entire edge. Any gaps or loose sections provide an easy entry point for paint to bleed through. Use a putty knife or a credit card to smooth down the tape edges thoroughly.
Achieving Professional Results in Home Painting
Beyond the specific issue of tape bleeding, achieving a professional-looking paint job involves several fundamental practices. Attention to detail during preparation is paramount. This includes cleaning the surfaces to be painted, filling any holes or cracks, and applying a primer if necessary, especially when painting over dark colors or glossy finishes.
When painting large areas with a roller, loading the roller evenly and applying consistent pressure helps avoid lap marks – the visible lines where one roller stroke overlaps another. For cutting in edges, using an angled brush and maintaining a steady hand is key. Holding the brush at an angle and using the tip to guide along the edge allows for precise application without overloading the brush.
The choice of tools also plays a significant role. High-quality brushes and rollers, along with good painter’s tape, can elevate the final outcome. Even experienced painters often employ the techniques mentioned above to ensure flawless results, demonstrating that these methods are not just for beginners but are best practices for anyone seeking a superior finish.
Conclusion: A Smooth Finish is Within Reach
The experience of India Brown serves as a valuable lesson for anyone undertaking a painting project. While the frustration of a ruined paint job is understandable, the solution is remarkably simple: timing the removal of painter’s tape is critical. By pulling the tape while the paint is still wet, or by employing sealing techniques like painting over the tape edge with the wall color, DIYers can effectively prevent paint bleed and achieve the crisp, clean lines that define a professional finish. Coupled with careful preparation and the right tools, these methods empower homeowners to transform their living spaces with confidence and achieve results they can be proud of.
